Hallo
Nach dem ich fest gestellt hatte, dass mein Ciclop 3D-Scanner besser mit der Horus SW läuft, habe ich mir
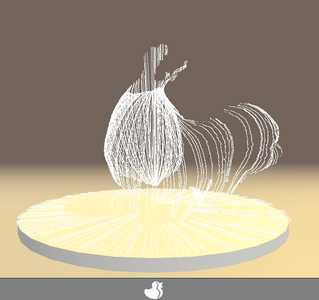
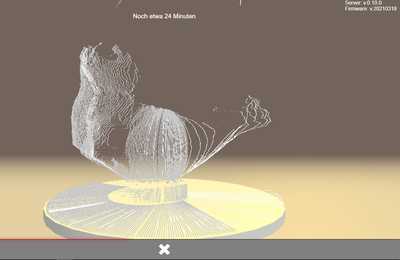
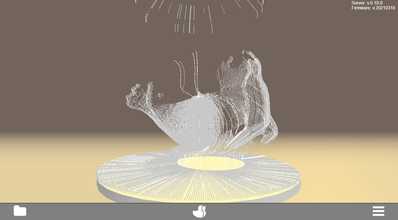
den Fabscan Pi gebaut. Funktioniert alles soweit gut, jedoch werden beim Scan Linien ausgelassen, so dass Lücken
entstehen. Das geschieht sowohl mit nur einem Laser oder mit Laser 1+2, wobei dabei Laser 1 öfters Lücken produziert, d.h. es fehlen Scanlinien.
Ich benutze die 1mW Laser von Watterott. Sonst ist das Scanbild gut und ohne störende Ausreißer.
Das Scan-Objekt hat raue Oberfläche, nicht glänzend. Es stellt einen Seehund dar.
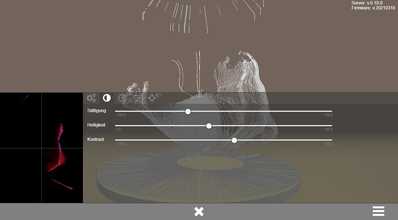
Hab schon eine Weile herumprobiert und letztlich bei diesen Einstellungen gelandet.
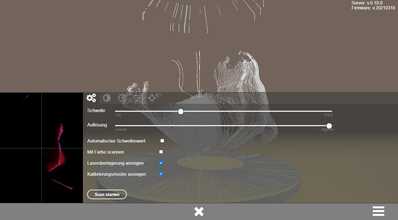
Die Einstellungen sind: Scan ohne Color, Threshold 60%, Sutaration -40, Brightness 40, Contrast default.
Hat jemand eine Idee?
Ich benutze die Version 0.10.0.
So habe ich jetzt einige Scans gemacht immer mit einem mehr oder weniger ähnlichen Ergebnis. Die Lücken sind im Scan mit der höchsten
Auflösung am Größten und zwar ausschließlich beim 1. Laser (rechter Laser). Auf der Suche nach einem Fehler habe ich bereits die Kamera
ausgetauscht ohne Erfolg. In der Log-Datei wird kein Fehler angezeigt. Raspi-Temperatur ist um die 60°C.
Zusätzlich habe ich LEDs zur Anzeige der Laseraktivität angeschlossen und in den Kasten integriert, so dass ich von außen sehen kann
wann ein Laser schaltet. Mir ist dabei aufgefallen, dass beim 1.Laser (rechts) die Einschaltphase kürzer ist als beim 2. Laser (links) der
relativ konstant schaltet und auch jeden Scan zeichnet.
Ich komme hier nicht weiter und hab das Projekt mal zur Seite gelegt. Vielleicht weiß Mario einen Rat.
.
Hier einige Bilder vom letzten Scan
Hello, I have also experienced much the same thing with the version 0.10.0 software and suspect that there are some development bugs in it. In addition to your experience if you run the motor to observe the amount of bloom/reflections from the lasers, the scan will not progress when initiated. at most both lasers make one cycle and quit. Observed with my ciclop work the scan will not complete to the point where you can save to your host computer or the Fabscanpi SD card.
This has happened with all three controllers I have used (the Ardiuno/ Zum combination, the Fabscanpi Hat or the Watterott Arduino Hat with the function of the Zum hat but wired for the Arduino pins of the Fabscanpi Hat). The only common item different from the Fabscanpi that I see is the dimensions for the calibration chart and table. The Ciclop firmware was loaded with the normal Ciclop controller and of course the Fabscanpi firmware loaded with the other two controllers.
We need to realize that Mario does the major (perhaps only programming on this). It is a little above my present ability. I am willing to do some testing if Mario needs some conditions verified.
Another thought or suggestion for a later release. It would be very helpful if the digital setting values were displayed for the sliders and these values were then saved in the setting file. This way, they would be available for this system every time it was restarted.
In addition, settings can be communicated better. It's just a suggestion and maybe it can be implemented later.
@wolf2021 , das ist seit der v.10 so, dass dieScans nicht mehr so hochauflösend sind. War vorher nicht so.... Das hat aber viel mit der Performance zu tun. Ich für meinen Teil vermisse es nicht und es reicht auch aus, so wie es jetzt ist. Du kannst, wenn du willst, das alles in der config dir so einstellen, dass du super hochauflösende Ergebnisse erzielst. Ich bin da auch nur durch Zufall drauf gekommen. Es gibt hierzu bis jetzt noch nichts in der Doku. Ich müsste mal einen Screen machen, wo man diese Werte einstellt, aber ich hab den Pi grad nicht zur Hand. Komme einfach in den Discord #German#, dort wird dir schnell geholfen. Den Link findest du oben im Menue "Community".
Danke für die Anregung. Den Zusammenhang der Auflösung habe ich schon bemerkt und die default.config.json dahingehend geändert.
"degree_per_step": {
"low": 1.6,
"medium": 0.8,
"high": 0.4
Trotzdem sind diese Lücken vorhanden, bei 0.4 ist es nicht so gravierend und erträglich. Bei mir ist die Kombination der Regler
Threshold und Saturation entscheidend. Sieht man am Laser Overlay (blaue Linie). Folgt die nicht korrekt dem Laser ist der Effekt
anschließend größer.

