Twin laser: Bad sca...
 
Notifications
Clear all

Twin laser: Bad scans

18 Posts
3 Users
0 Reactions
1,335 Views
iadegesso
Posts: 32
Topic starter
(@iadegesso)
Eminent Member
Joined: 6 years ago

Hi @mario ,

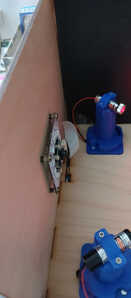
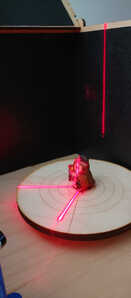
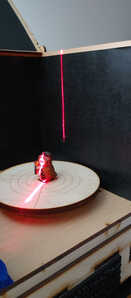
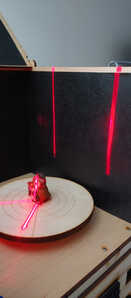
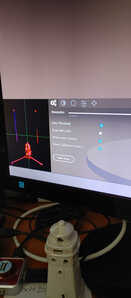
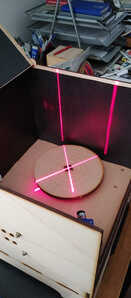
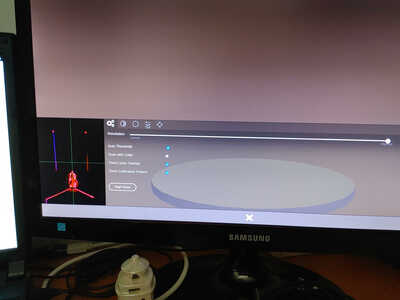
after a 3-years long stop I started again fighting against my FabscanPi. Before COVID-19 pandemic, I added a second laser to my original setup (the base setup I bought from Wetterott Electronic); the only things that are different is the second laser (since I ordered a fixed focus red laser, but I received a focussable red laser module) and the led ring camera mount that I mounted using four springs in order to better center the camera (you can see the whole setup in the pictures, including the 3D printed laser towers and the black walls). I run the latest pre-built image on a Raspberry Pi 3B+, setting up the main clock at the standard frequency of 1400MHz (I added a small passive cooler to the CPU and I will add two small fans to cool both boards and the NEMA 17MH3410 stepper motor), and I power up the scanner using two separated PSU (a 5V PSU for the Raspberry Pi 3B+ and a 12V PSU for the FabScanPi HAT).

I was in this situation three years ago (with just the second laser)... now, with 0.10.0 and the latest firmware available, scan quality is decreased and even setting up the highest scan resolution the point cloud is very sparse and with low deteils (using a single laser and the 0.7.0 release I got better results three years ago...).

I tryed to perform a good calibration, trying to cross lasers as precisely as I could in the center of the plate, trying to better positioning the center of the camera, and verifying the height of the top of the plate (I measured 245mm and not 155mm as in the default configuration file, but checking the position of the mounting ring I found it is 5mm below the top of the NEMA 17MH3410 axis... as requested in mounting instructions).

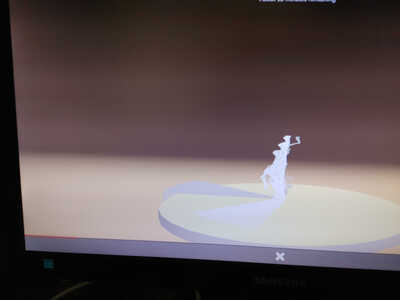
Despite all I told above, my scans are unusable, dirty and completely deformed (and i fixed the scanned piece to the plate in order to avoid underided movements).

Please help me!!!

Thanks,

Iade Gesso, PhD (in Computer Science)

Reply
Topic Tags
17 Replies
Danilo0702
Posts: 394
(@danilo0702)
Reputable Member
Joined: 6 years ago

Do you have changed to 2 lasers in the default configuration file?

Reply
iadegesso
(@iadegesso)
Joined: 6 years ago

Eminent Member
Posts: 32

@danilo0702 yes, it's yet in the default config file

Reply
iadegesso
Posts: 32
Topic starter
(@iadegesso)
Eminent Member
Joined: 6 years ago

I cannot understand why pictures have not been uploaded...

20220711 152724 HDR
20220711 161739 HDR
20220711 161719
20220711 161746 HDR
20220711 161935
20220711 152706
IMG 20220711 161951
IMG 20220711 162134
IMG 20220711 163203
IMG 20220711 164134
IMG 20220711 164148
IMG 20220711 164920


Reply
iadegesso
Posts: 32
Topic starter
(@iadegesso)
Eminent Member
Joined: 6 years ago

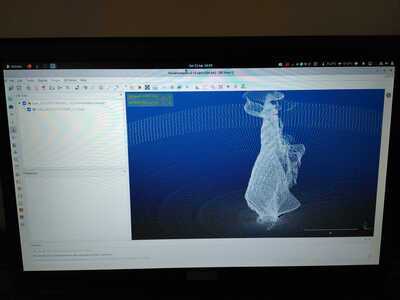
This is the secon lader point cloud

IMG 20220711 165030
IMG 20220711 165030
Reply
iadegesso
Posts: 32
Topic starter
(@iadegesso)
Eminent Member
Joined: 6 years ago

I think my problem is the same described here...

And, as @yhellowt, I'm using the latest 0.10.x aka 0.10.2 version of FabScan-Server


Iade

Reply
mario
Posts: 570
Admin
(@mario)
Honorable Member
Joined: 6 years ago

Hi, 

have you tried to perform a scan with just one laser to be sure that the basic software setup is working. Does your motor run in 1/16 step mode. If you are using the FabScanPi HAT, double check which motor driver you are using. Depending on your driver you might need to change some jumper settings on the HAT. 

https://fabscanpi-server.readthedocs.io/en/latest/steps_fabscanpi.html#assemble-motor-drivers

Another important configuration parameter is number of steps. It depends on the motor/driver setup. For a motor with 200 steps per full rotation in 1/16 mode the value should be 3200. Some kits came with a 400 steps per rotation motor, those should be set to 6400 steps in the configuration. 

Related to "shadows": try to prevent a light incidence. Try to cover the slits on the lit. Maybe it is easier to cover the whole case with some fabric for a quick test.

Keep in mind that you need to do a re-calibration after changing the laser config settings. 

- Mario 

Reply
iadegesso
Posts: 32
Topic starter
(@iadegesso)
Eminent Member
Joined: 6 years ago

Hi @mario,

first of all, thanks and a small errata corrige...

Posted by: @iadegesso

NEMA 17MH3410 stepper motor

but yesterday I was a bit fused and the correct stepper motor model is NEMA 17HM3410.

Posted by: @mario

Another important configuration parameter is number of steps. It depends on the motor/driver setup. For a motor with 200 steps per full rotation in 1/16 mode the value should be 3200. Some kits came with a 400 steps per rotation motor, those should be set to 6400 steps in the configuration. 

I'm sure it's a 400 step motor because if in the default.config.json I didn't change from 3200 steps to 6400 steps, I wasn't able to perform calibration.

Posted by: @mario

have you tried to perform a scan with just one laser to be sure that the basic software setup is working

Three years ago I was on the 0.7.0 server version with a single laser and the scan result was not exciting but the point cloud was infinitely more precise and dense... Yesterday I tryed to disable the second laser setting up the number of lasers to 1 in the default.config.json but calibration failed... Do you think it's better to unwire the second laser unit?

Posted by: @mario

Does your motor run in 1/16 step mode. If you are using the FabScanPi HAT, double check which motor driver you are using. Depending on your driver you might need to change some jumper settings on the HAT. 

I have to check this... this afternoon I will look for it. But if with older server version it worked, I think the motor driver was configured correctly. Where I can find the jumpers you mentioned?

Many thanks,

Iade

PS: at the moment, the only point through which the light came inside the chamber is the joint of the lid which does not fit well on the hinge side.

Posted by: @mario

Related to "shadows": try to prevent a light incidence. Try to cover the slits on the lit. Maybe it is easier to cover the whole case with some fabric for a quick test.

In my case it seems part of the shadow came from erroneous detections of the laser on the plate and on the wall

Reply
iadegesso
Posts: 32
Topic starter
(@iadegesso)
Eminent Member
Joined: 6 years ago
Posted by: @iadegesso

I have to check this... this afternoon I will look for it. But if with older server version it worked, I think the motor driver was configured correctly

Ok @mario, I checked the motor driver is a TMC2100-LA, the black PCB version... so I think it is the model that handle 3-5V.


The motor should be set to the correct current level, otherwise the motor will overheat, loss steps or even wobble. A good starting value for VRef is ~0.7V. You can find detailed instructions at Watterotts F.A.Q.

What I never did is to setup motor current (but three years ago I didn't see the above note in the documentation...). I need to do this?

Reply
iadegesso
Posts: 32
Topic starter
(@iadegesso)
Eminent Member
Joined: 6 years ago

My last test, putting a dark towel on the scanner... I did it leaving checked the option to scan with colors... It's helpful!!!

It seems that around half of the scan process the point cloud starts to be deformed... and not very dense

colored scan


Reply
mario
Posts: 570
Admin
(@mario)
Honorable Member
Joined: 6 years ago

Still looks like bad calibration values to me. 

There is no need to do any jumper settings while using a TMC 2100. But i recommend to set the current of the driver. A voltage of 0.7v at the reference pin should be fine. When the driver gets to hot it skips steps this will result in bad scan results and more evil a bad calibration.

Reply
iadegesso
(@iadegesso)
Joined: 6 years ago

Eminent Member
Posts: 32

Hi @mario 

yesterday I calibrated the voltage of the TMC 2100 to 0,71V (I was not able to understand if mime was the 2100 V1 or the 2100 V2 but I tryed with a multimeter and I think it's the V1)... moreover, I discovered that in my setup the wires of the stepper coils where swapped: I had the wiring black-gree-red-blue... now I fixed this problem wiring the NEMA 17HM3410 stepper motor as show in the documentation (i.e., green-black-blue-red).

First calibration, with a dirty default.config.json, failed in laser plane detection... I didi a new calibration again but using a clean default.config.json and waiting about 30 minutes before powering up the scanner (in order to cool it) and the calibration worked like a charm (and without any temperature warning...).

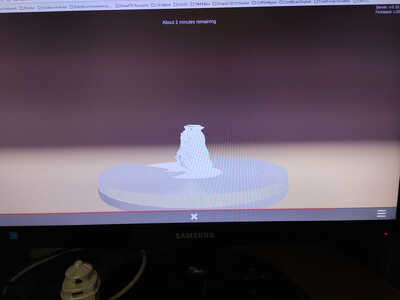
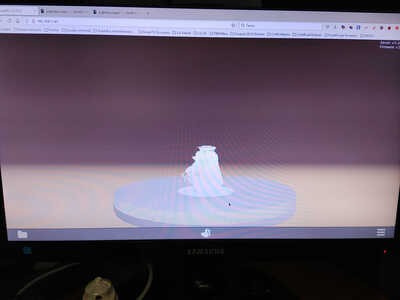
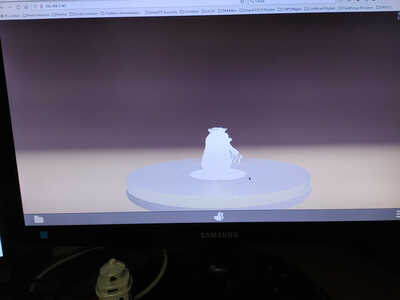
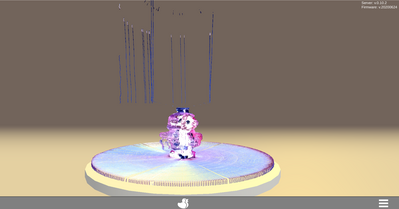
But scan process ended up in a bad scan again (even if I didi it after another cooling stop)... you can see it in the picture.

PS: in both cases, calibration and scan, I covered the top of the scanner with a dark towel, as suggested, to reduce external lights.


Iade

scan


Reply
mario
Admin
(@mario)
Joined: 6 years ago

Honorable Member
Posts: 570

@iadegesso is that the same object as on the first pictures?

Reply
iadegesso
(@iadegesso)
Joined: 6 years ago

Eminent Member
Posts: 32

Hi @mario ,

yes, it's the same object. I just switched from monocrome to colored scan in order to better understand what goes bad.


Iade

Reply
iadegesso
(@iadegesso)
Joined: 6 years ago

Eminent Member
Posts: 32

Hi @mario,

here my default.config.json after the last (successful) calibration process, i.e., the one before the scan you can see in my previous message:

{
    "folders": {
        "www": "/usr/share/fabscanpi/",
        "scans": "/home/pi/scans/"
    },
    "laser": {
        "interleaved": "False",
        "numbers": 2,
        "color": "R (RGB)"
    },
    "scanner_type": "laserscanner",
    "calibration": {
        "weight_matrix": [],
        "dist_camera_matrix": [],
        "pattern": {
            "square_size": 11,
            "rows": 6,
            "columns": 8,
            "origin_distance": 38,
            "type": "chessboard"
        },
        "camera_matrix": [
            [
                1337.439,
                0.0,
                656.283
            ],
            [
                0.0,
                1350.82,
                812.459
            ],
            [
                0.0,
                0.0,
                1.0
            ]
        ],
        "distortion_vector": [
            -0.301,
            4.236,
            0.001,
            0.028,
            -9.802
        ],
        "laser_planes": [
            {
                "distance": 94.73554439896581,
                "normal": [
                    0.7856596258078344,
                    0.006794378567873224,
                    0.6186216847115609
                ],
                "deviation": 0.013626997003149798
            },
            {
                "distance": 91.27922017330725,
                "normal": [
                    -0.844457552242273,
                    0.006017678643183207,
                    0.5355886761356474
                ],
                "deviation": 0.03913062836925943
            }
        ],
        "platform_translation": [
            -8.210059939774952,
            58.04509668636208,
            158.00104904591822
        ],
        "platform_rotation": [
            [
                0.0,
                0.9998262247425632,
                -0.018641896819620526
            ],
            [
                -0.022396707634817825,
                -0.018637220728796287,
                -0.9995754306157323
            ],
            [
                -0.9997491622837802,
                0.00041751711282748114,
                0.02239281564118285
            ]
        ],
        "type": "chessboard"
    },
    "meshlab": {
        "path": "/usr/bin/"
    },
    "process_numbers": 3,
    "turntable": {
        "steps": 6400,
        "radius": 70,
        "height": 155,
        "degree_per_step": {
            "low": 3.6,
            "medium": 1.8,
            "high": 0.8
        }
    },
    "camera": {
        "resolution": {
            "width": 1640,
            "height": 1232
        },
        "preview_resolution": {
            "width": 800,
            "height": 600
        },
        "rotate": "True",
        "hflip": "True",
        "vflip": "False",
        "type": "PICAM",
        "undistort": "False"
    },
    "connector": {
        "type": "serial",
        "firmware": "fabscanpi",
        "baudrate": 115200,
        "autoflash": "True",
        "flash_baudrate": 115200,
        "port": "/dev/ttyAMA0"
    },
    "texture_illumination": 160,
    "keep_raw_images": "False",
    "keep_calibration_raw_images": "False",
    "discoverable": "True",
    "online_lookup_ip": "8.8.8.8"
}


Iade

Reply
iadegesso
Posts: 32
Topic starter
(@iadegesso)
Eminent Member
Joined: 6 years ago

Hi @mario ,

today I added a couple of passive heatsinks to the TMC2100 (the second one is just to enlarge the hot area coverage, even if I put the former exactly in correspondence of the mai driver integrated circuit).

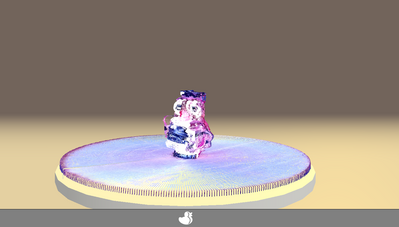
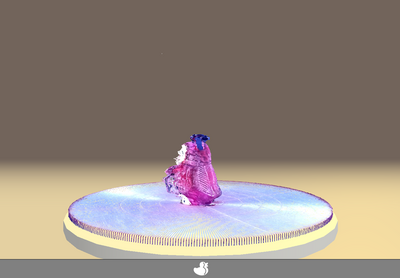
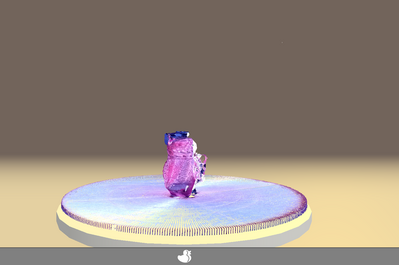
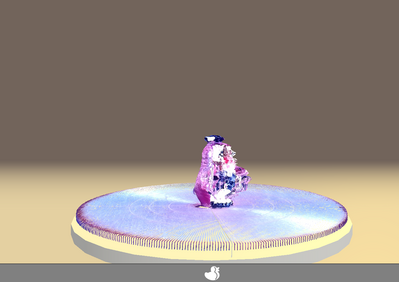
Then I recalibrated the scanner from scratch (using a default.config.json file without any previeous calibration data). The results seems to be better than the previous ones but, considering that the scan process was set to high resolution, the result is still quietly poor (I will try adding active cooling in next weeks); you can see the scan results here:

scan1
scan2
scan3
scan4

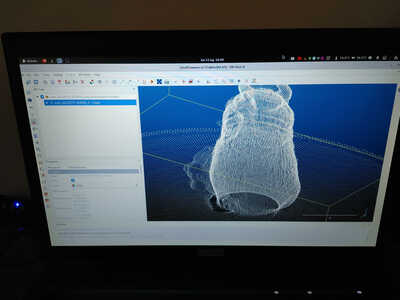
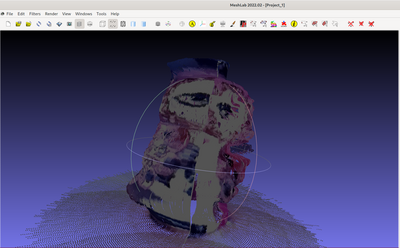
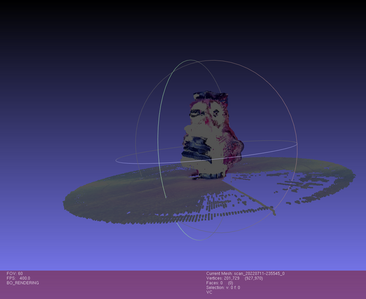
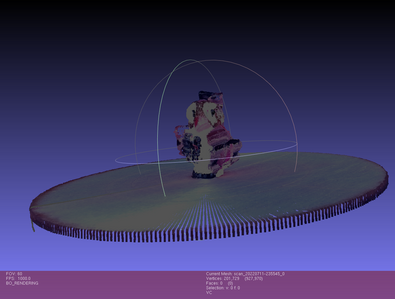
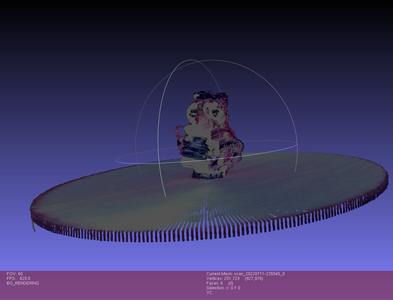
Moreover, in the following you can see the point clouds as MeshLab shows to me:

  • "Laser 1"-only point cloud:
    mesh0
  • "Laser 2"-only point cloud:
    mesh1
  • Merged point clouds:
    mesh both


Iade

Reply
iadegesso
Posts: 32
Topic starter
(@iadegesso)
Eminent Member
Joined: 6 years ago

PS: I was thinking about the fact that the object can vibrate during the rotation of the scanning plate ... do you think it can affect the quality of the acquisition? How do you suggest "to glue" the object to the plate?

Posted by: @iadegesso

correspondence of the mai driver integrated circuit

"correspondence of the mai driver integrated circuit" was a typing error... the right text is "correspondence of the main integrated circuit of the stepper driver"

Thanks,

Iade

Reply
iadegesso
(@iadegesso)
Joined: 6 years ago

Eminent Member
Posts: 32

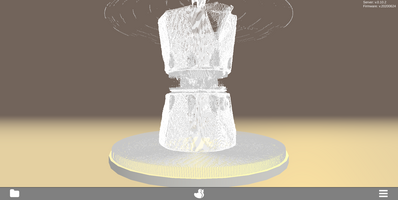
Here some result with a more heavy object (too tall, but not vibrating during rotation)


Iade

moka


Reply
Share: